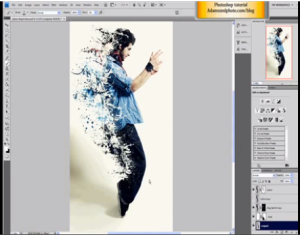
I’ve never really used photoshop before so I’m blown away by all of the cool ways you can manipulate and enhance pictures through it. After watching a bunch of random tutorials, I decided that I wanted to teach the class how to use the dispersion effect. I don’t have photoshop on my computer so I haven’t been able to try it myself, but that might make my instructions more detailed since I’ll be sure to write down every little detail necessary to perfect this technique.
Okay so first of all, I just looked up the definition of “dispersion” because I didn’t want to sound stupid and use it in the wrong context or anything like that. According to dictionary.com, dispersion is “the separation of white or compound light into its respective colors, as in the formation of a spectrum by a prism.” This sounds great to me, since the images that have stuck with me most from class so far are the ones of the “underworld.” Those pictures were so intriguing because of the lighting, so learning how to work with light and colors could be really beneficial.
So let’s start dispersing!
- Take any jpg that seems like it can be enhanced by manipulating the light on a portion of the image. This might just take some minor adjustments, such as increasing the contrast.
- Cut out the image that you want to disperse (it doesn’t need to be perfect, especially in the places you plan to focus on)
- Copy this cut out image and place it right behind the original one. Make this copy darker.
- Make a third copy, and pull it behind the image (this will become the dispersed part)
- Focus on the back copy. Take a white brush with maximum flow capacity and tap with different splatter sizes/ brushes.
- Focus on the darker version. Do the same spotting/ splattering method
- Make all layers visible. If you want to make it more extreme, use black splatters of paint on top of the white.
- It looks best to add a white background to enhance the effect.
- Add some vibrance, curves (to make it lighter in the background), and “paint with light”
10. “Paint with light” is a custom layer that you can add a highlight or burn effect with your black or white brush. Make sure you use a new layer for this and are in the overlay mode. This is good to use on skin areas.
Well there it is! This technique is also referred to as the “coming undone effect.” So hopefully this will be useful to enhance the lighting and bring excitement to your photos. I provided a bunch of links for extra clarification.
– TS

